From
Mt. Washington, we started south. We worked our way back to CT to
meet Mike Hessling and get our water tank repaired. Once the tank
was repaired, we returned to Long Island to visit in-laws and
discovered that our front wheel hub was having mechanical issues.
The photos below are what we saw.
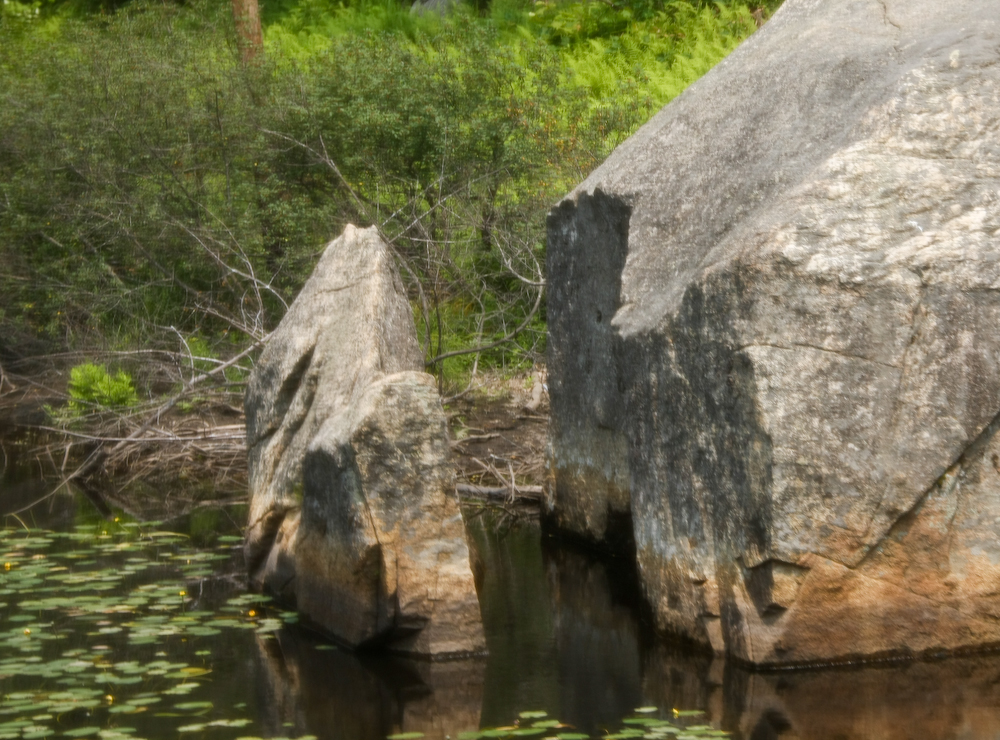
Along
one of the many rivers we passed, we saw a great example of freeze thaw
action on stream boulders. Note the crack in the boulder
above. The left and right halves match exactly; the repeated
freezing and thawing have separated the halves by several feet.
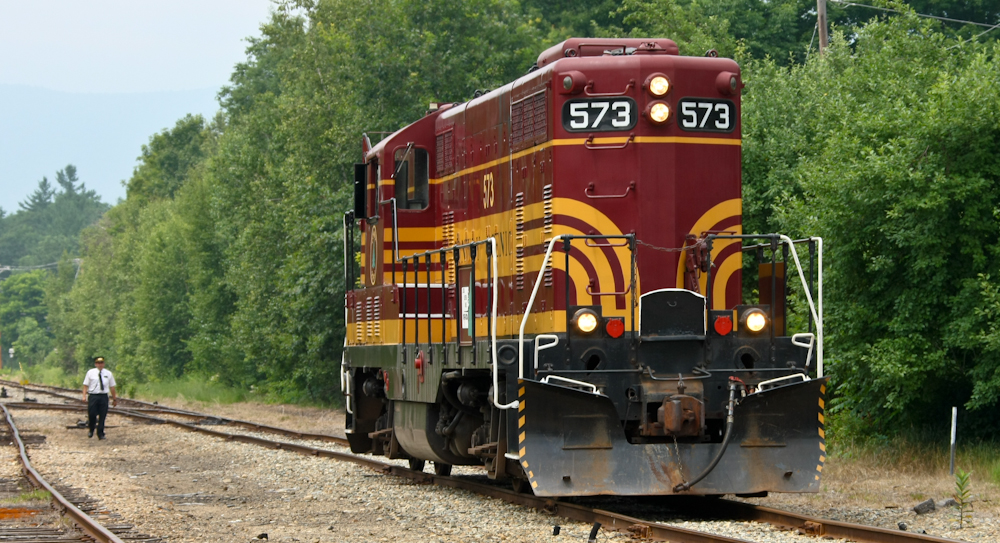
Near
Mt. Washington is the Conway Scenic Railway. We took the lunch
trip and it was fun. The food was acceptable, but the trip was
short. Above, our engine goes around us at the end of the trip to
get to the front of the train for the return trip.

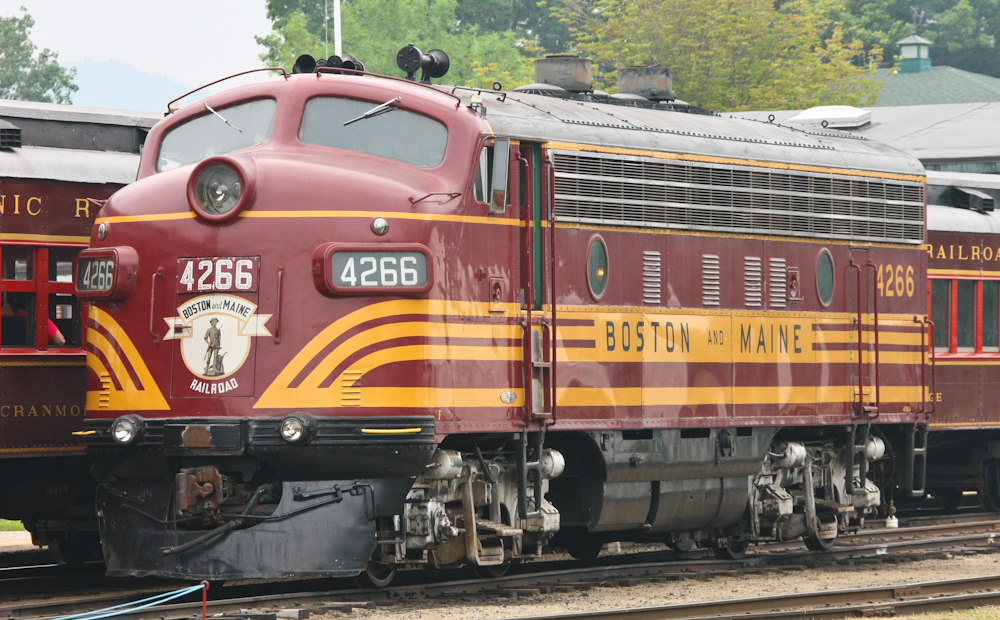
There
was a museum at the train station and there were several interesting
relics near the round table.
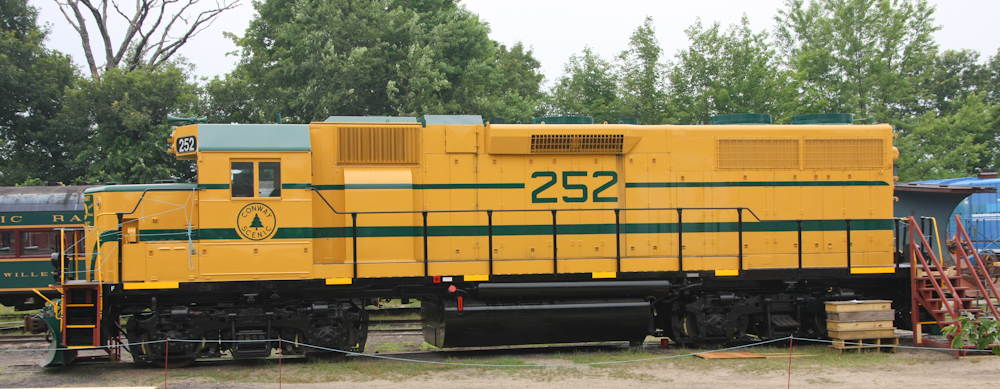
I
believe this is a GP35 locomotive.
This
engine is being harvested for spare parts.
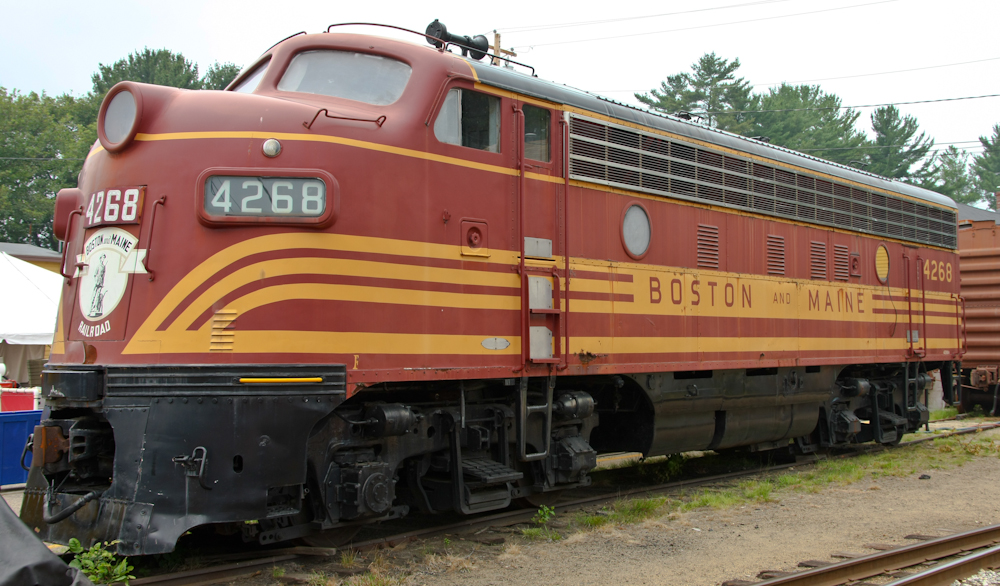
This
engine is fully functional and was running while we were there.
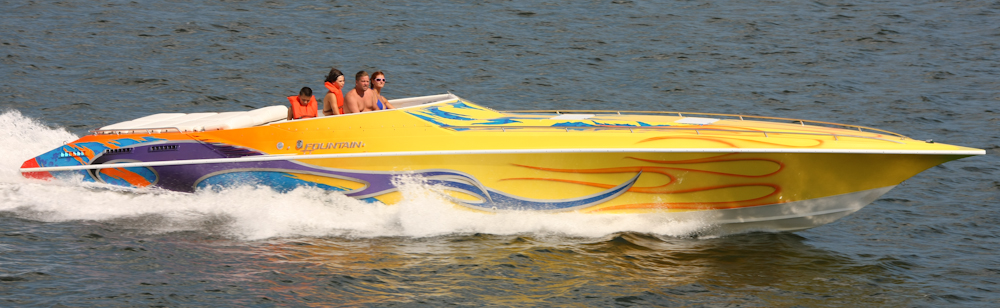
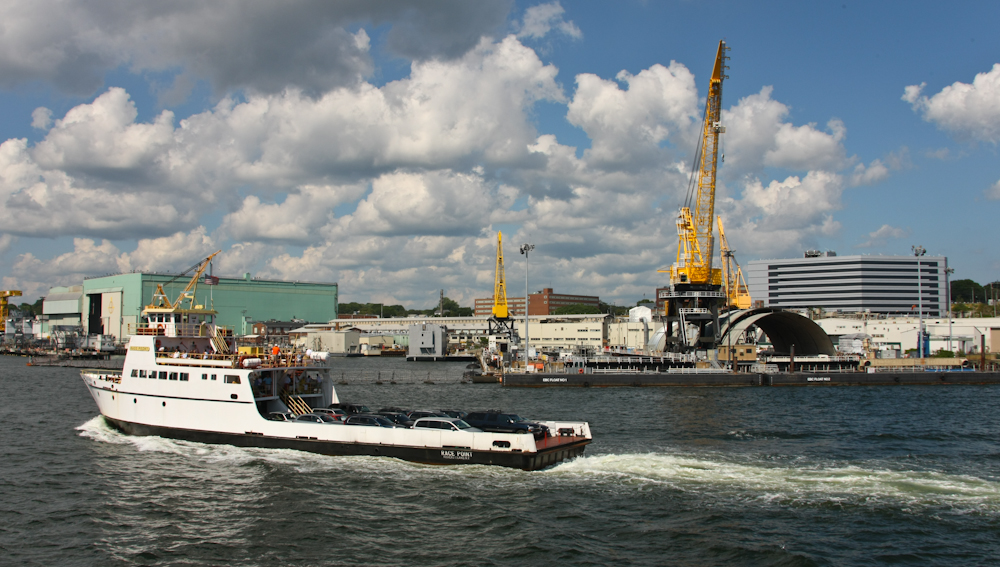
From NH, we headed south to CT to get our water tank repaired. Mike and Barb agreed to receive our tank and hold it for us while we were in Maine. Once the tank was repaired, we went with Mike's family to an awesome fireworks display. Next day, we headed south to Long Island on the Cross Sound Ferry. We had no reservations, and several ferry crossings were canceled. So, we ended up waiting for several hours to get an available spot. But, we did succeed. From the ferry, we spotted this very fast boat running circles around the ferry.
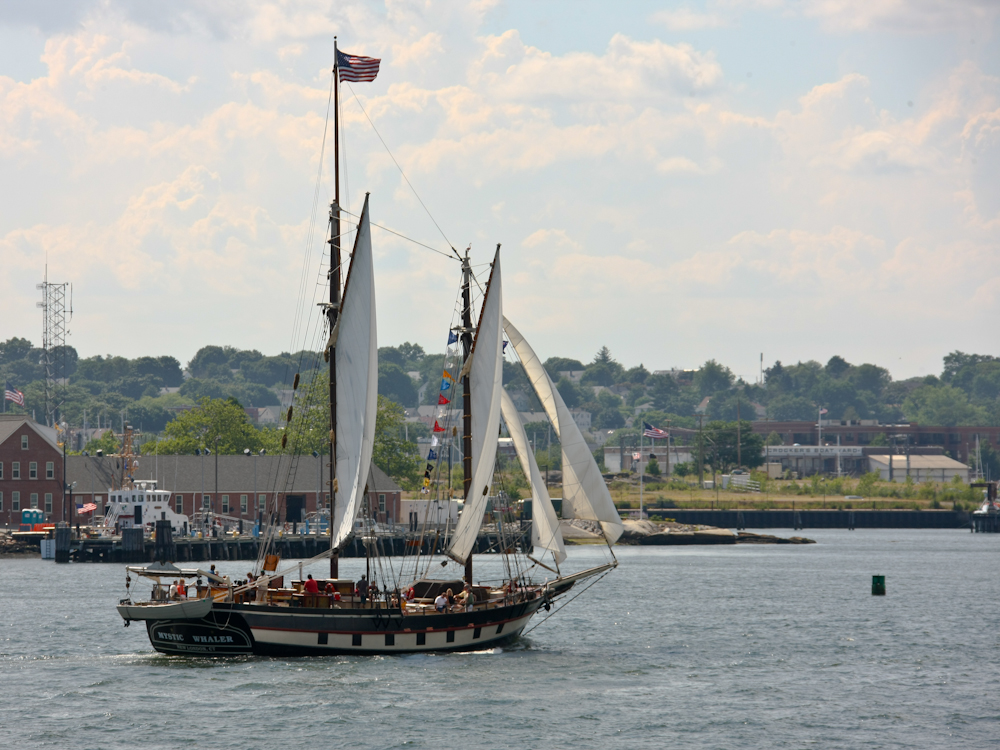
From the ferry, we also saw this nice multi-mast sail boat used for tours.
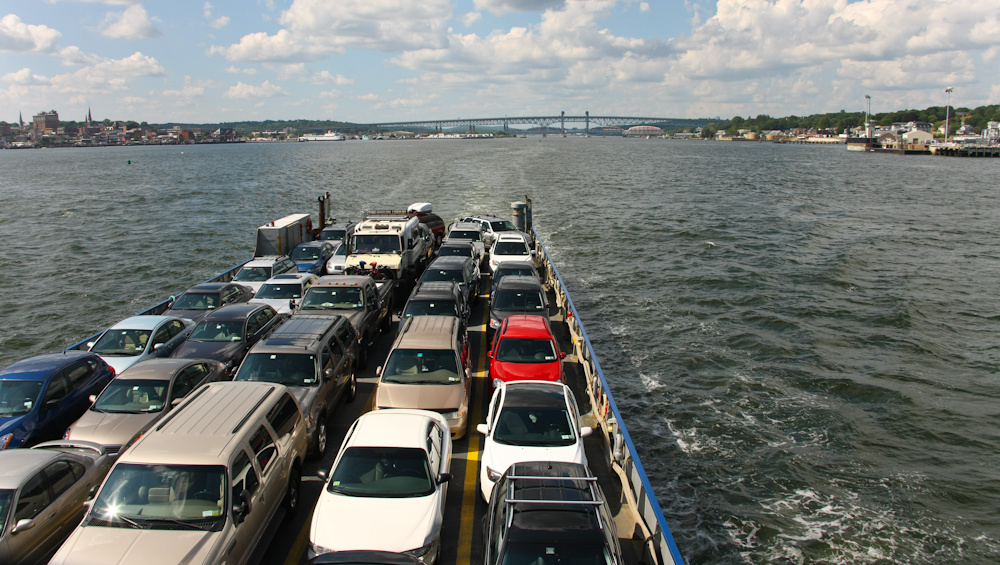
The
mog was one of the last vehicles let onto the ferry and is visible at
the back center of the ship. In the distance is the I-95 bridge.
The
sister ship to our ferry passed us. In the distance, you can see
the Electric Boat ship yard.
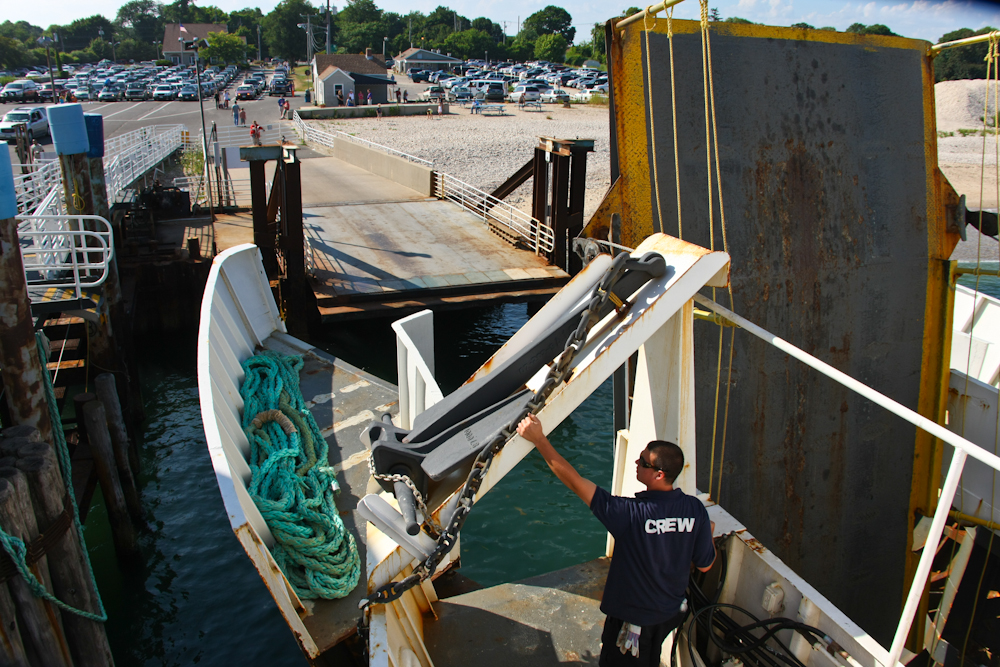
Our
ferry had a clam-shell bow with a retractable ramp.
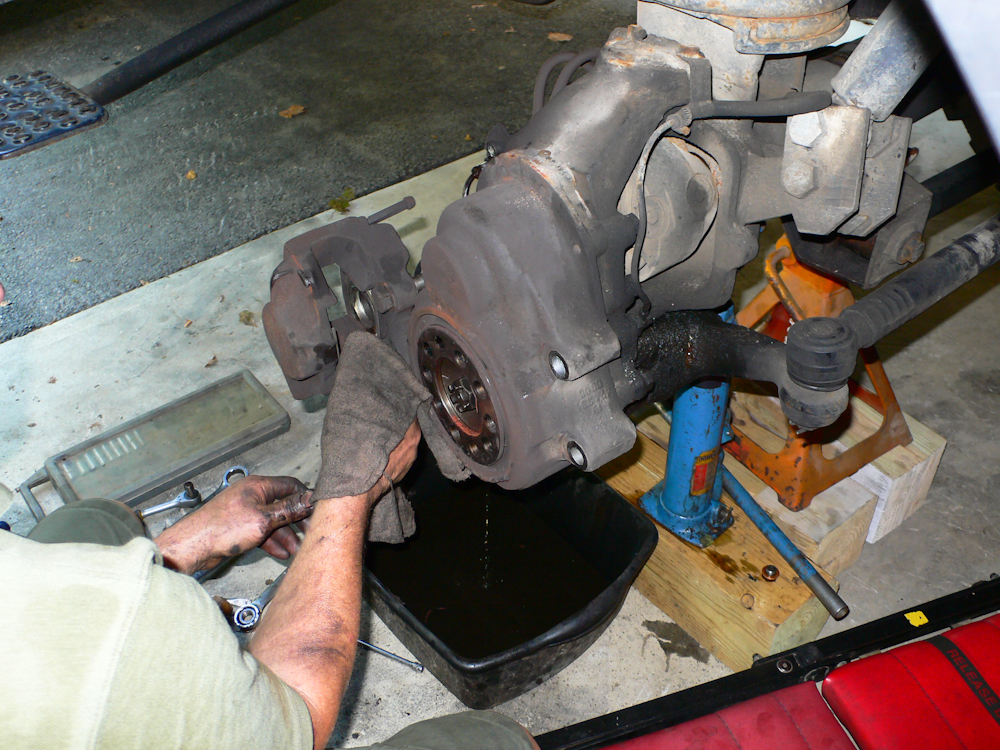
On
Long Island, we checked our hub fluid levels. One hub was low,
and as part of the inspection process, I noted some metal particles in
the oil. So, we drained the oil and found tons of metal from the
internal bearings. We flushed the oil several times and the hub
was still producing lots of metal. Clearly, this hub is well on
it's way to self-destruction. We worked out a plan to drive to
Highland Lakes, NJ to change the hub. Bob Benyon agreed to assist
us, but that would require us getting from Long Island to his place
without having the bearings seize up along the way. I was very
concerned that a full failure in the Bronx would be a major hassle, but
we confronted our fears and set out at low speed. Generally, we
kept our speed below 45 mph and checked the hub temperatures repeatedly
with our IR thermometer.
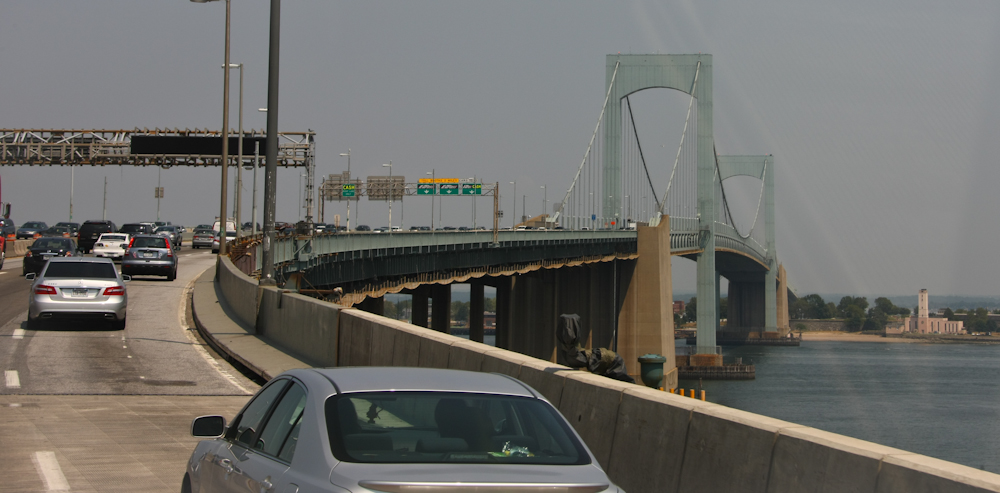
Traffic
along our path was quite heavy, so it was easy to keep our speed
low. Above is the Throg's Neck Bridge that connects Long Island
with the Bronx.
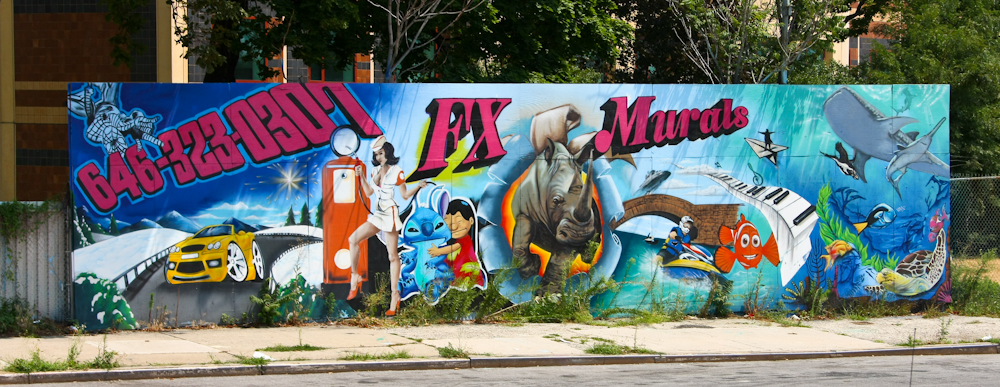
Along
the way, we passed many graffiti covered buildings. This was one
of the few structures that did not have graffiti until I realized that
the mural IS graffiti.
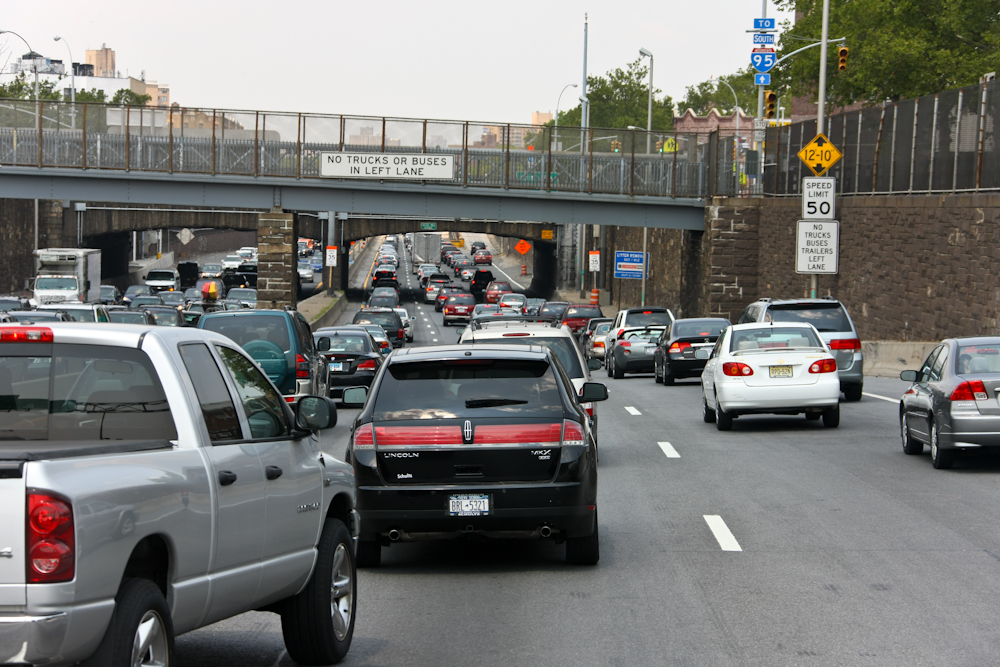
Traffic in the Bronx was heavy, but that made it easy to keep our speed low to not overheat the bearings.
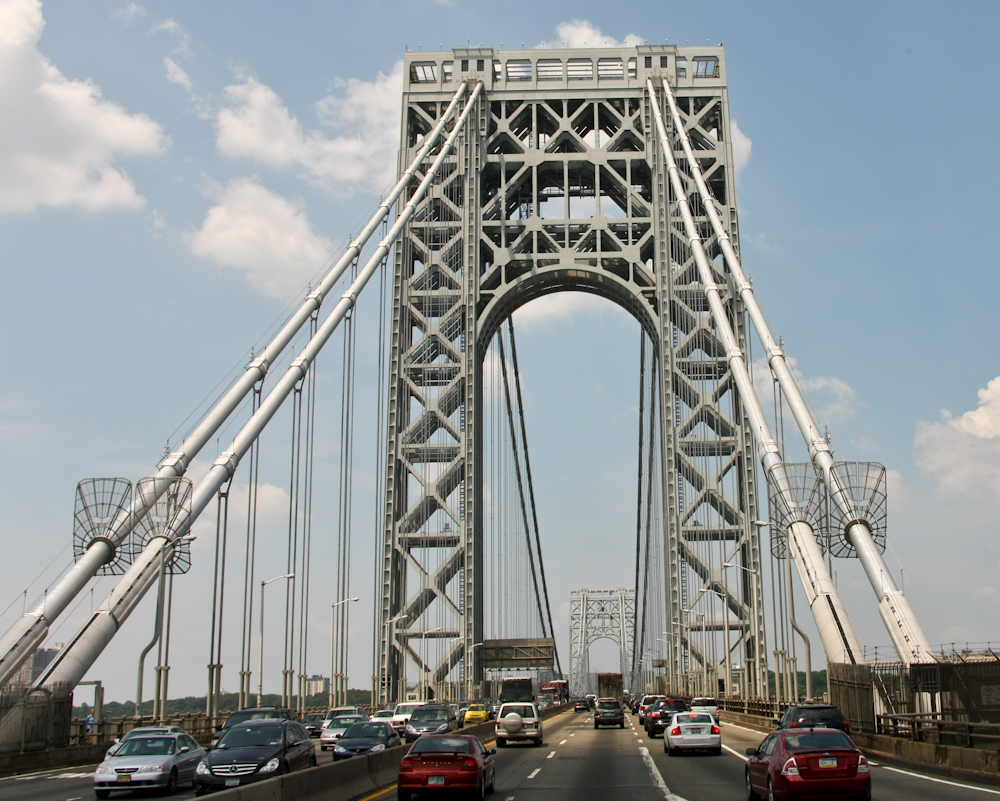
Our
route took us over the Hudson River and across the massive George
Washington Bridge.
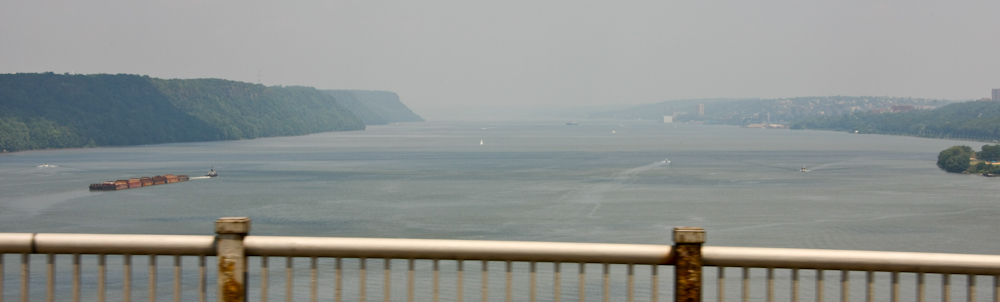
Looking
north from the bridge, we had a great view of the cliffs of the Hudson
River valley. NY is on the right of the photo above, NJ on the
left.
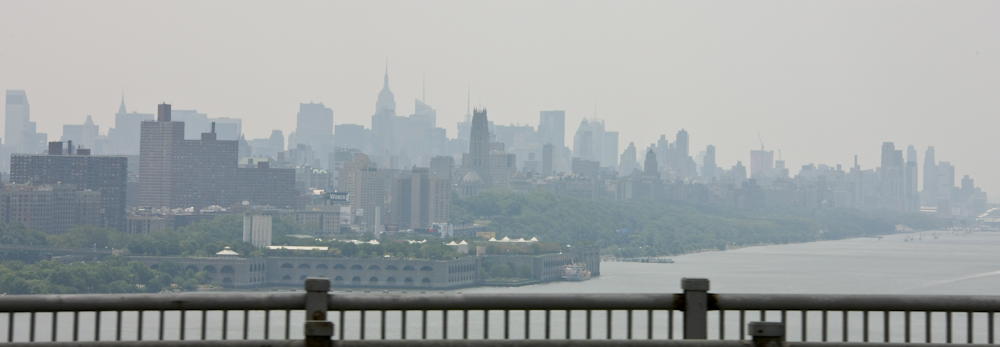
Looking
south from the bridge, we had a respectable view of the northern
Manhattan skyline.
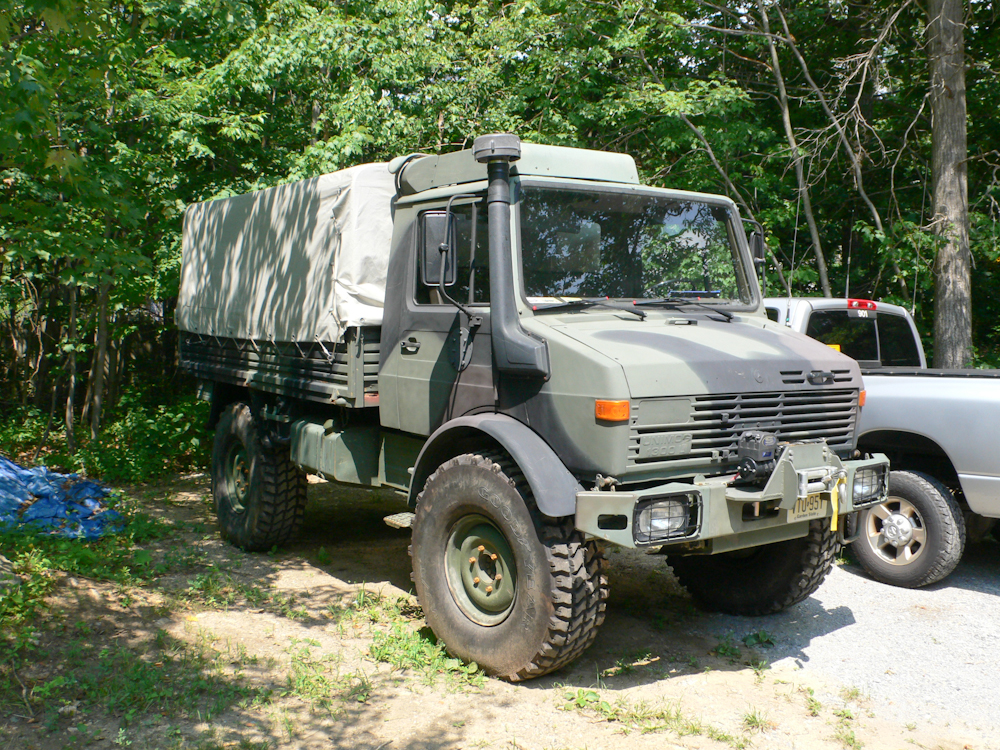
We
had good luck with our bearing and arrived at Bob's place in Highland
Lakes without incident. The hub was still holding oil, although
it was running 60 degrees hotter than the other side on the same
axle. Bob also has a 1300, still with military paint. His
truck also has a turbo, Claas overdrive and 395/85R20 rubber.
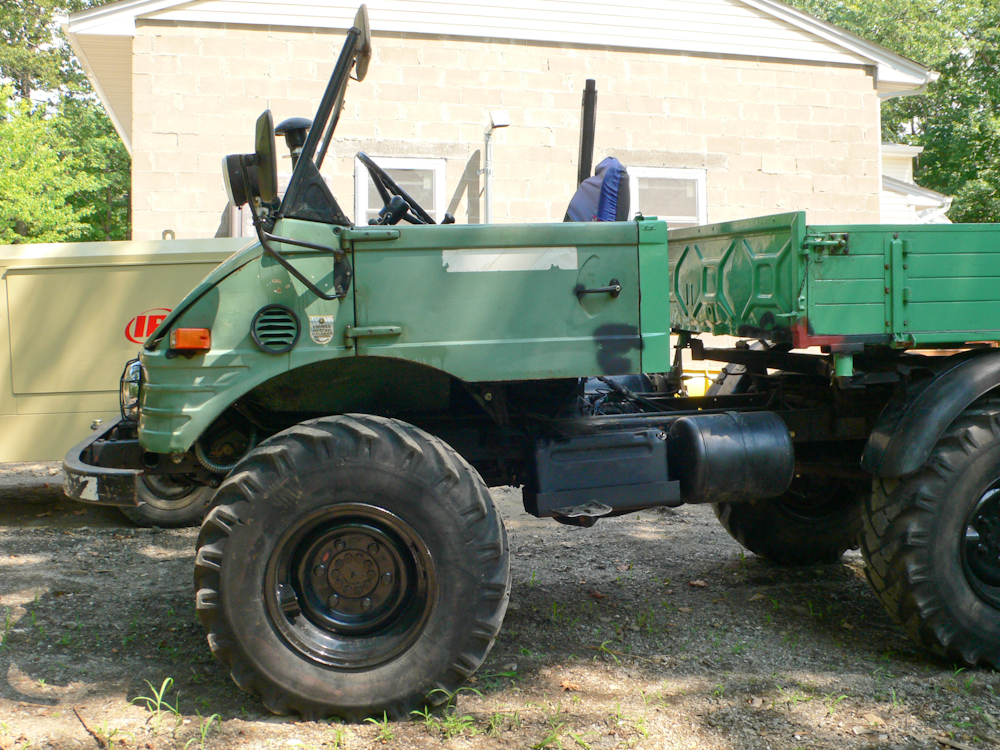
Also
parked at Bob's place is Gus' 421 that is being restored.
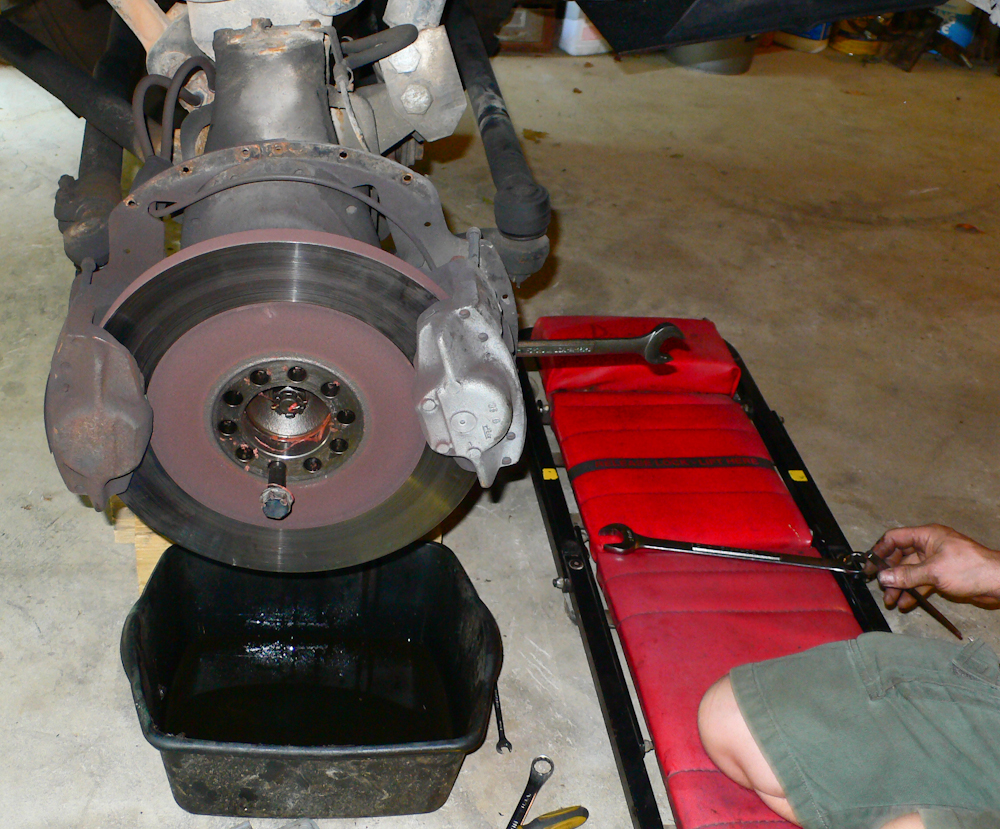
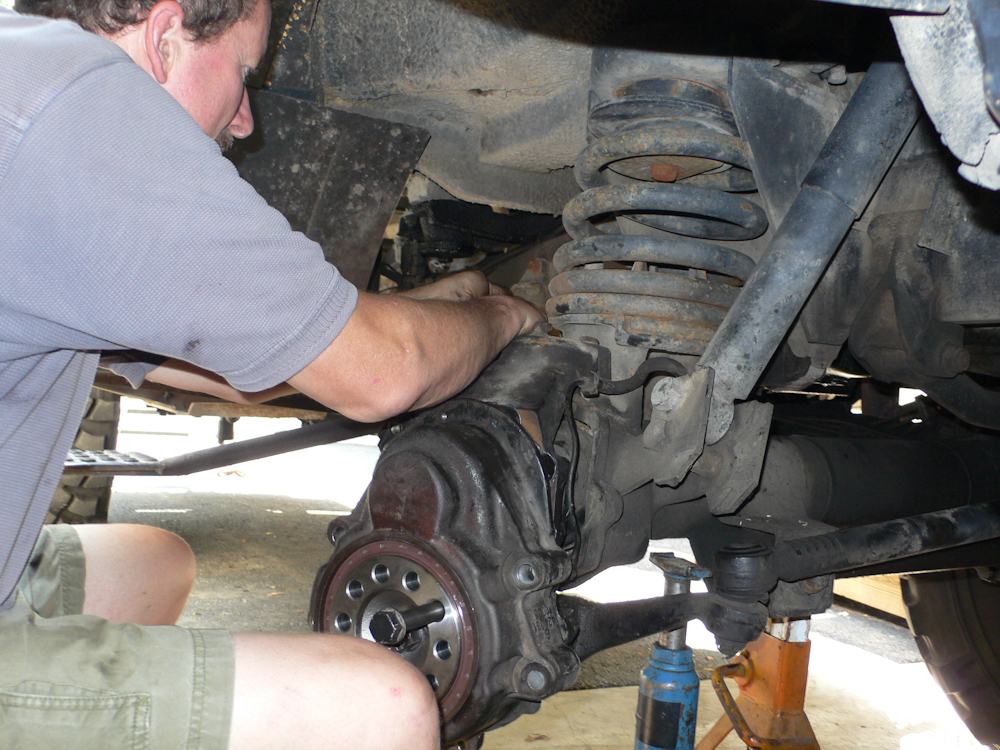
Bob
led the effort to repair the hub and he started by removing the wheel,
hub bolts and draining the hub oil.
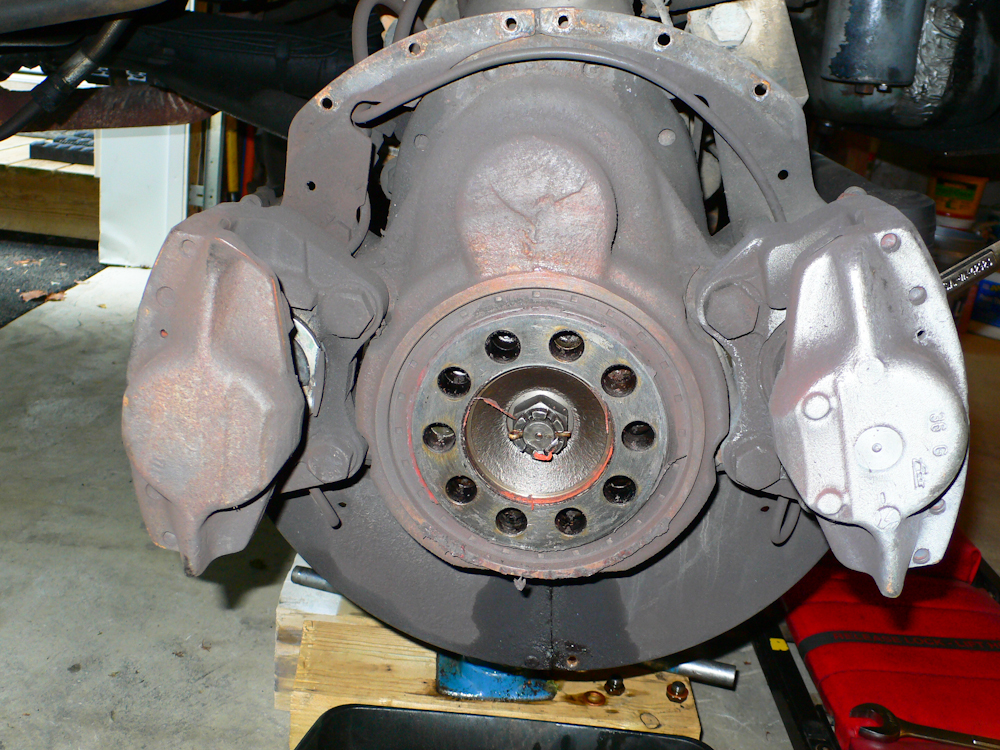
The
brake pads were extracted and the brake rotor was removed. The
good news was that the outer seal was not damage, and the hub was still
holding oil.
Next,
the stone shields were removed and the brake calipers were separated
from the hub housing.
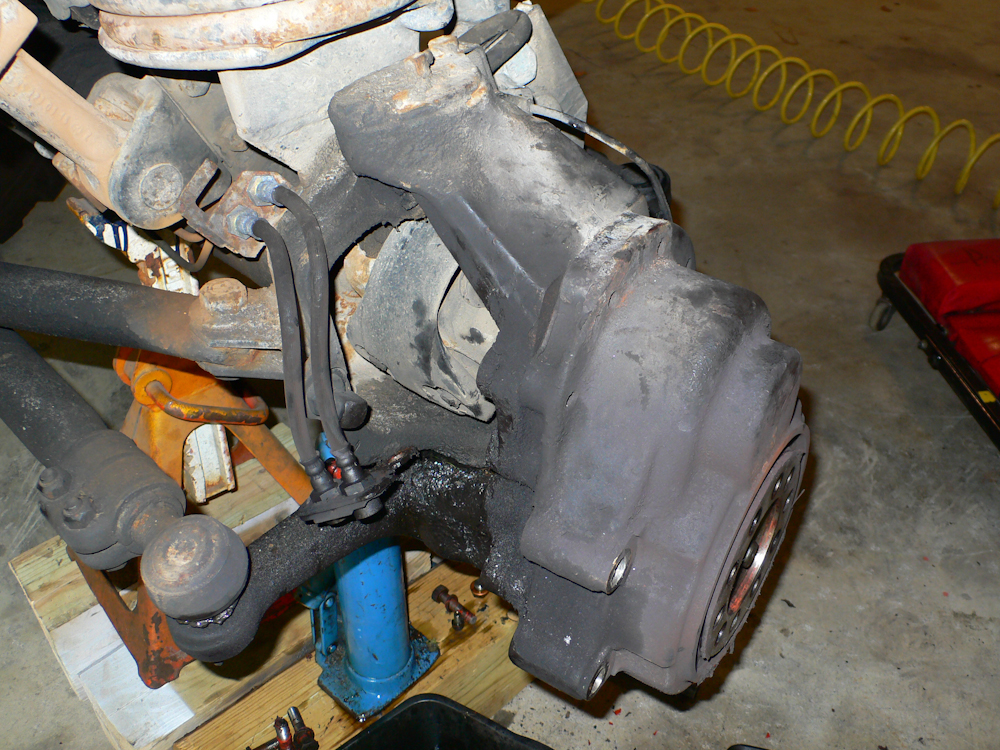
The
bolts that hold the halves of the hub were loosened and removed.
To access the top bolts, the wheel had to be turned to the side to
allow placement of a socket on the bolt head.
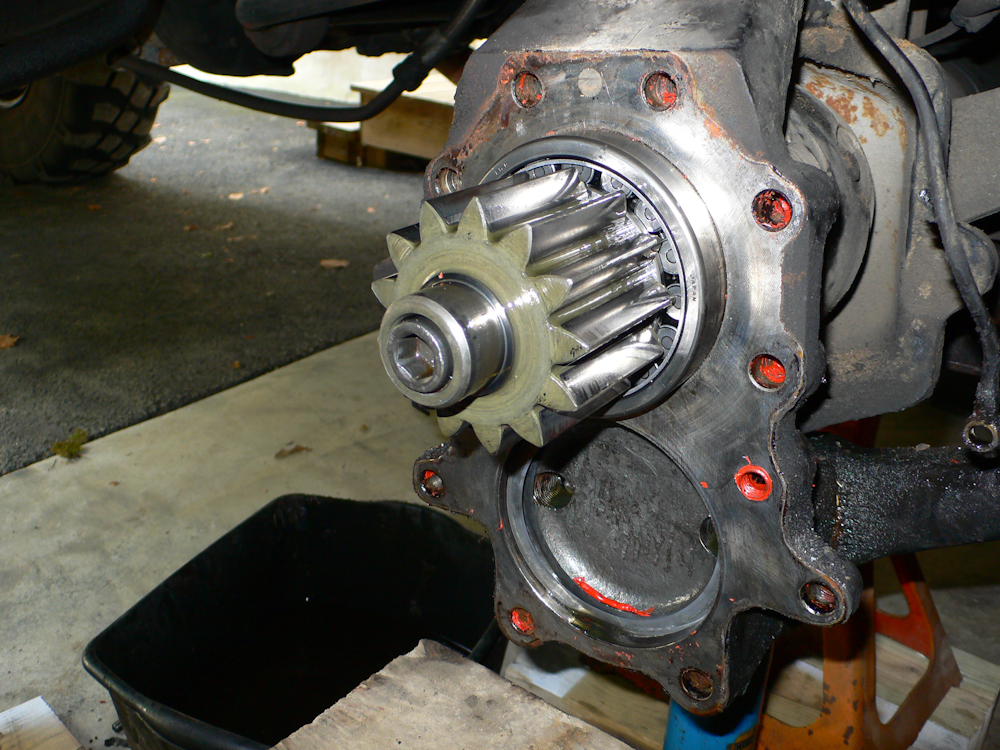
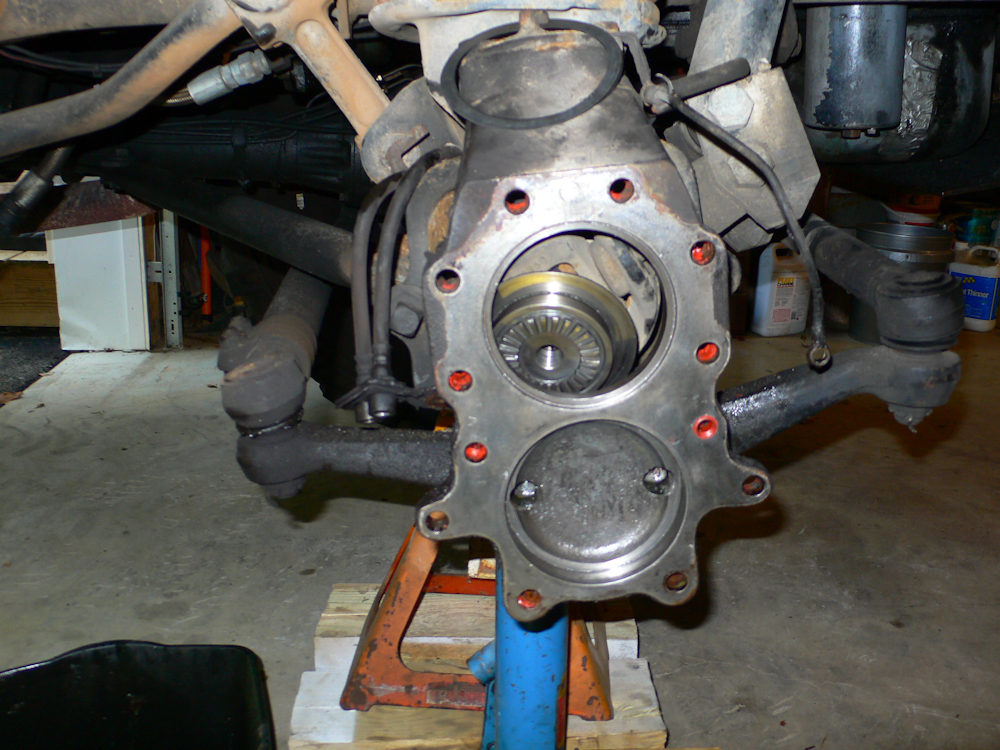
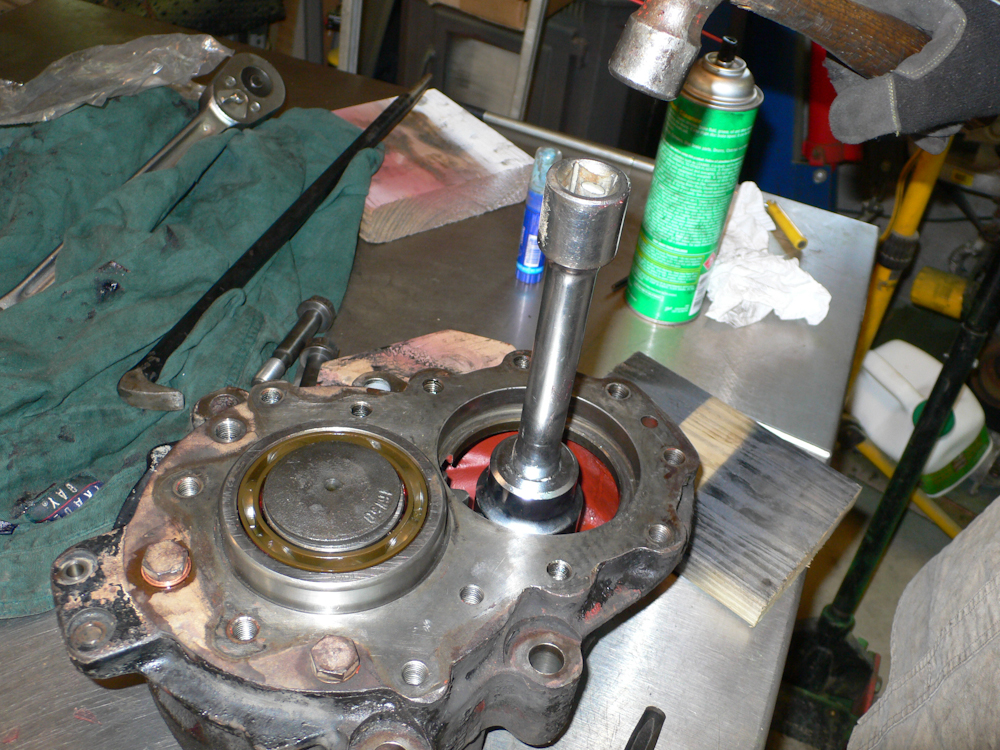
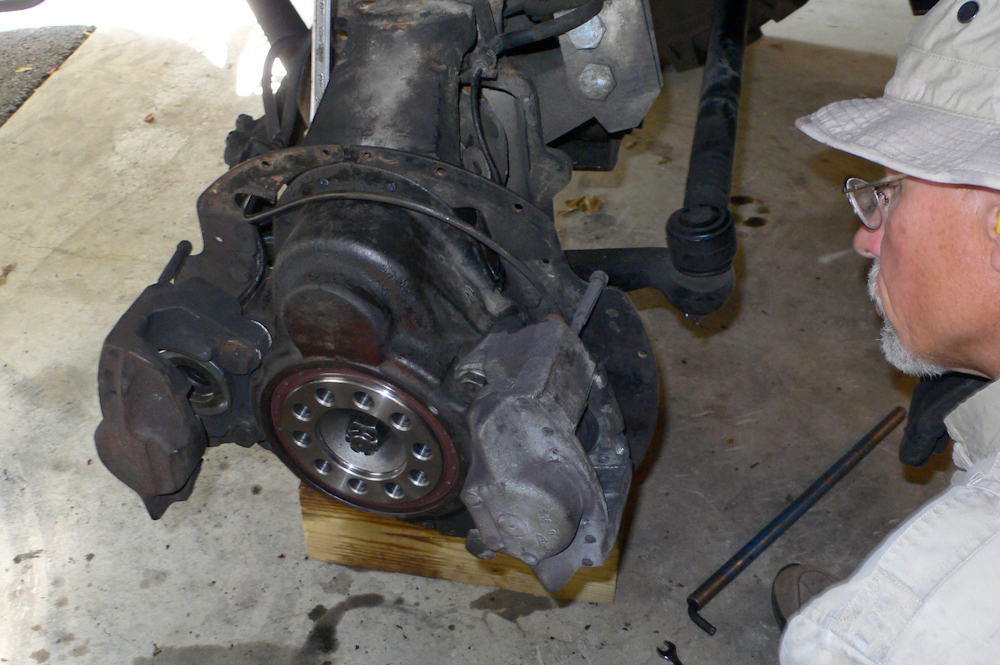
The
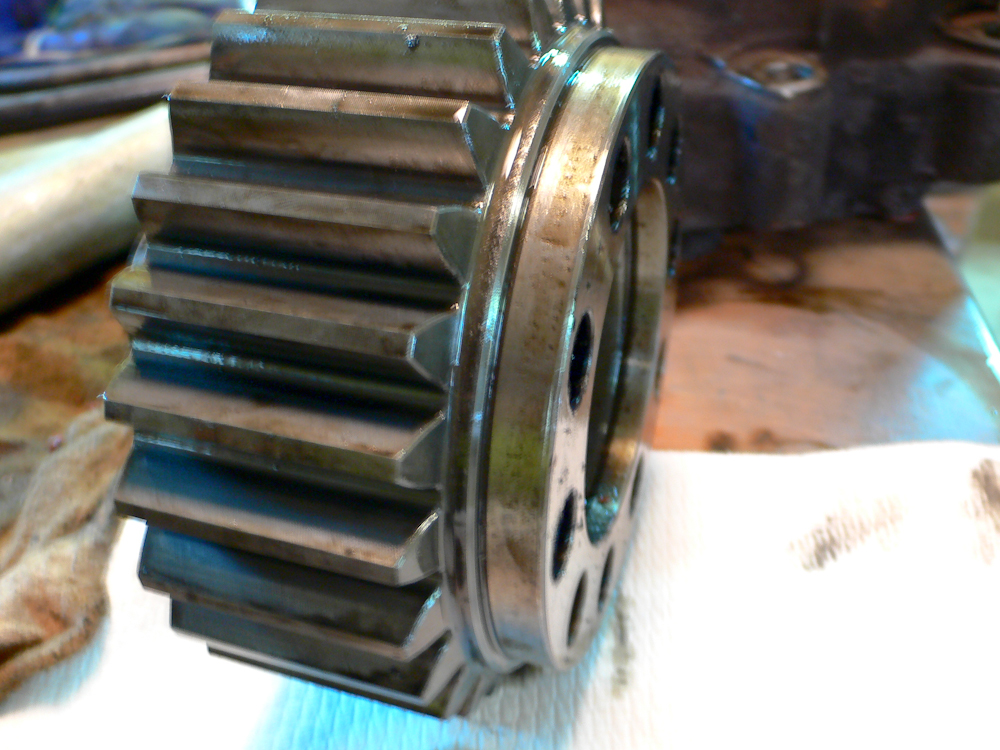
outer half of the hub was removed and the inner half was cleaned.
The driver gear looked serviceable, but the bearing had metal
contamination. The gear was removed as well as the upper, inside
bearing, shims and oil seal.
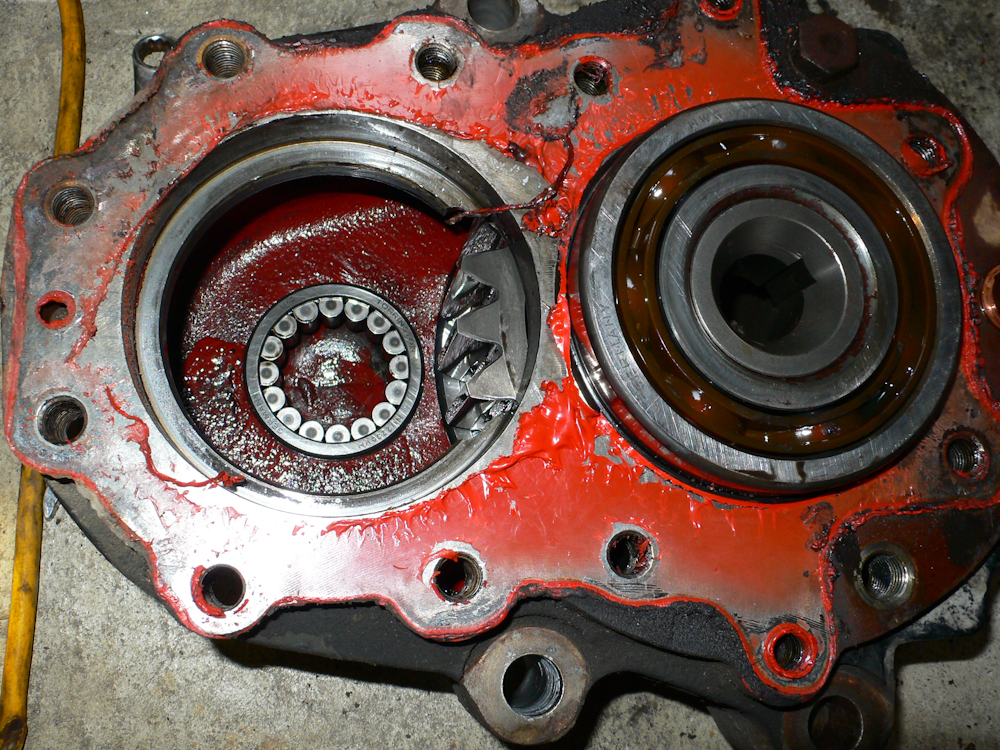
A
casual inspection showed no damage, but the metal particles showed that
there was big trouble looming.
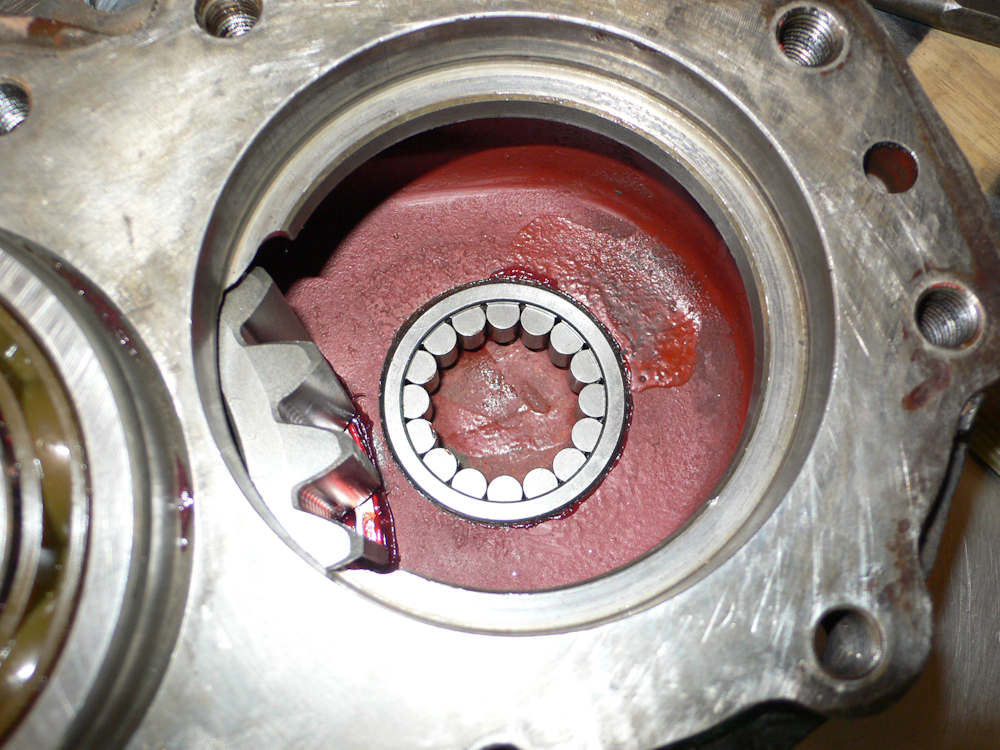
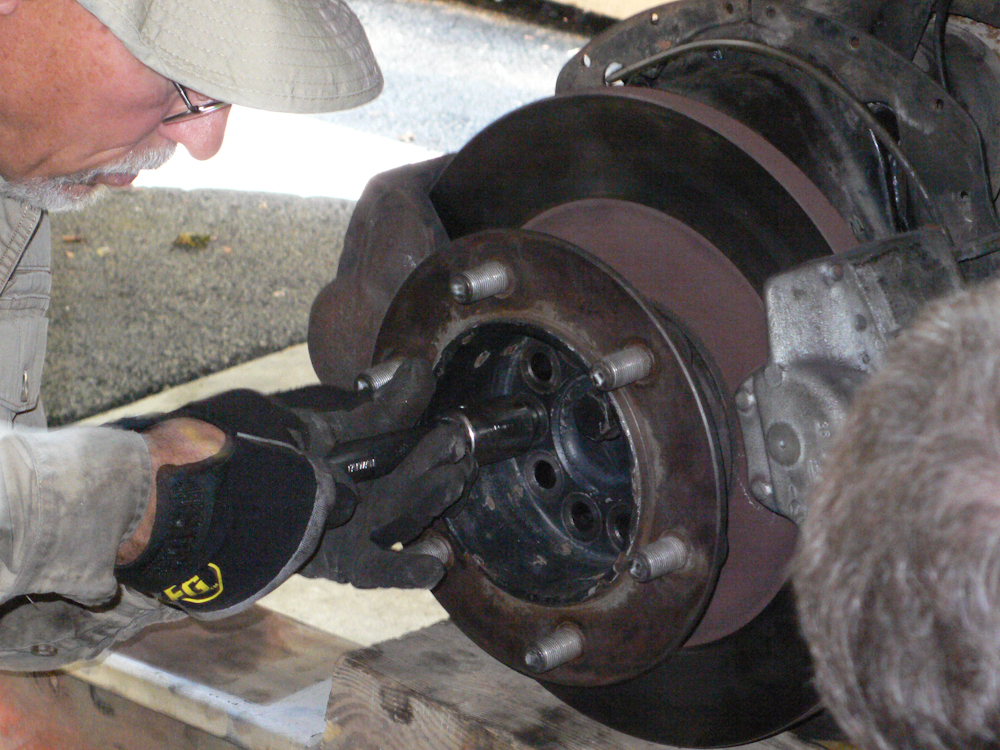
Removal
of the outside seal showed the true story. The roller bearings
were chewing into the driven gear. Note the metal particles.
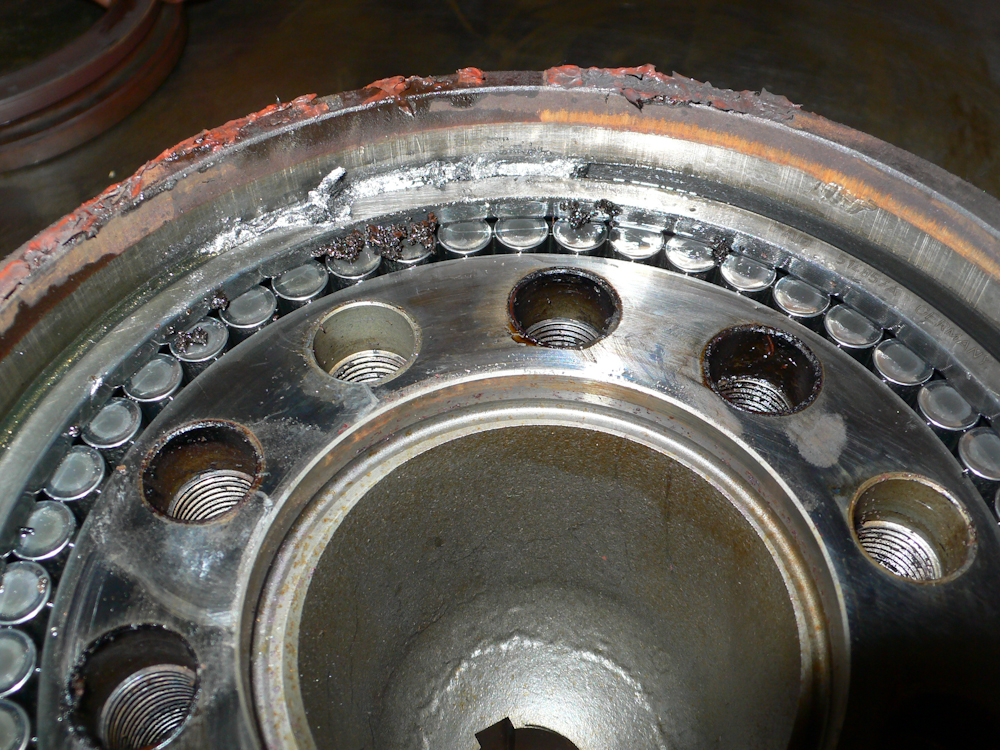
Removal
of the driven gear shows the trench that had been worn into the
bearing race. This gear is toast.
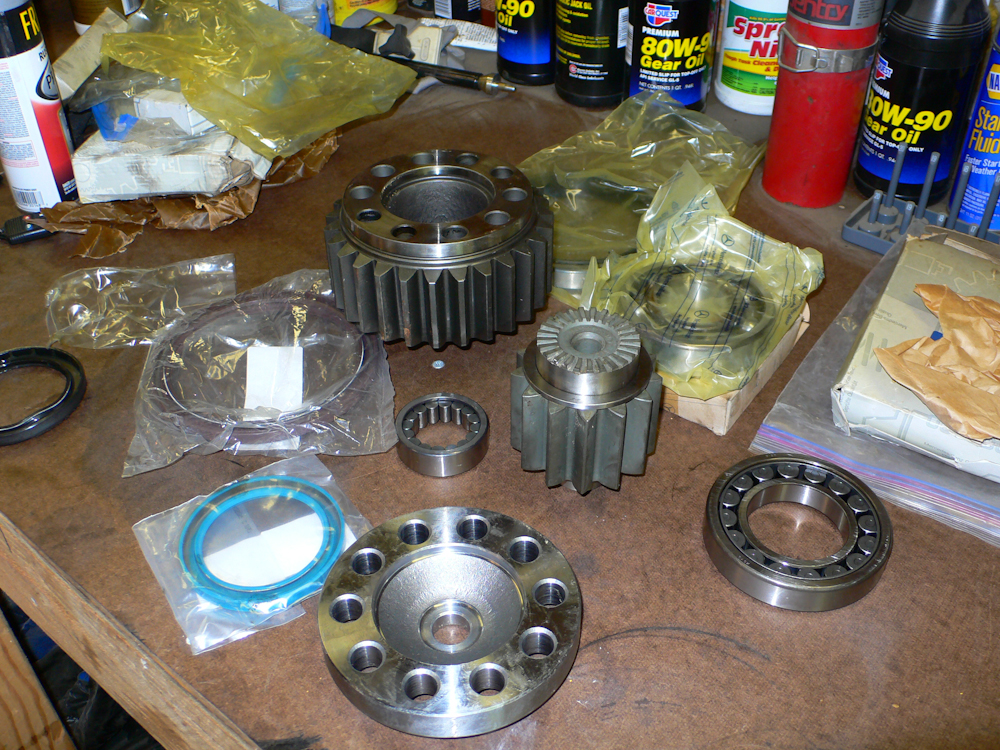
New parts out on the bench for inventory prior to installation.
The
inner half of the hub was cleaned and the inner seal was removed.
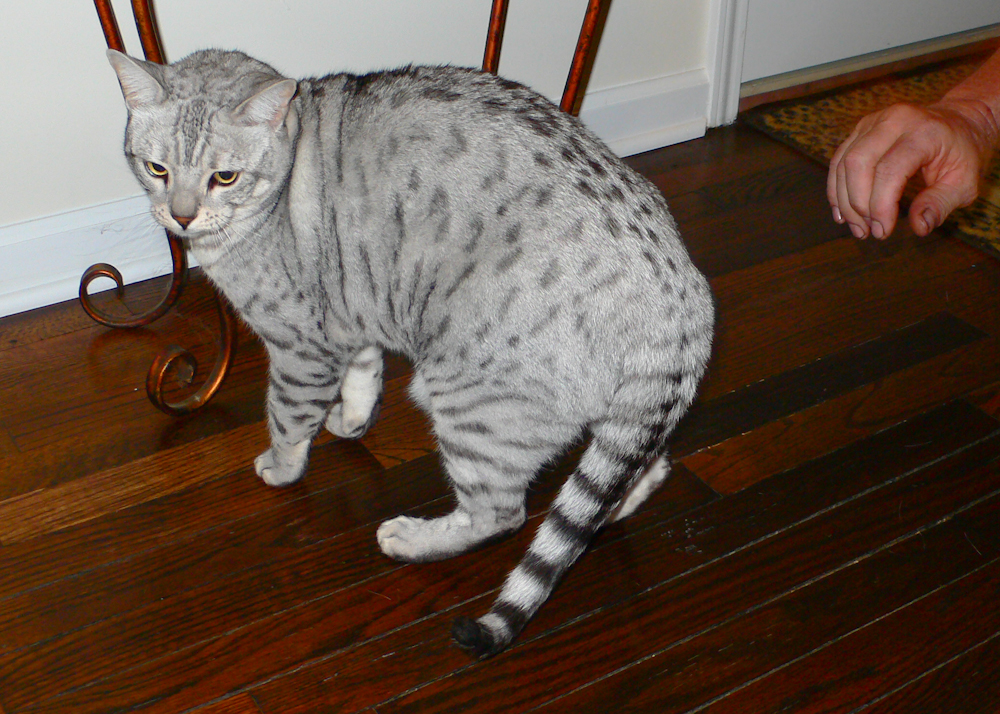
Bob
and Jo, our hosts, have a great Asian Leopard cat. Note Romeo's
nice spot pattern.
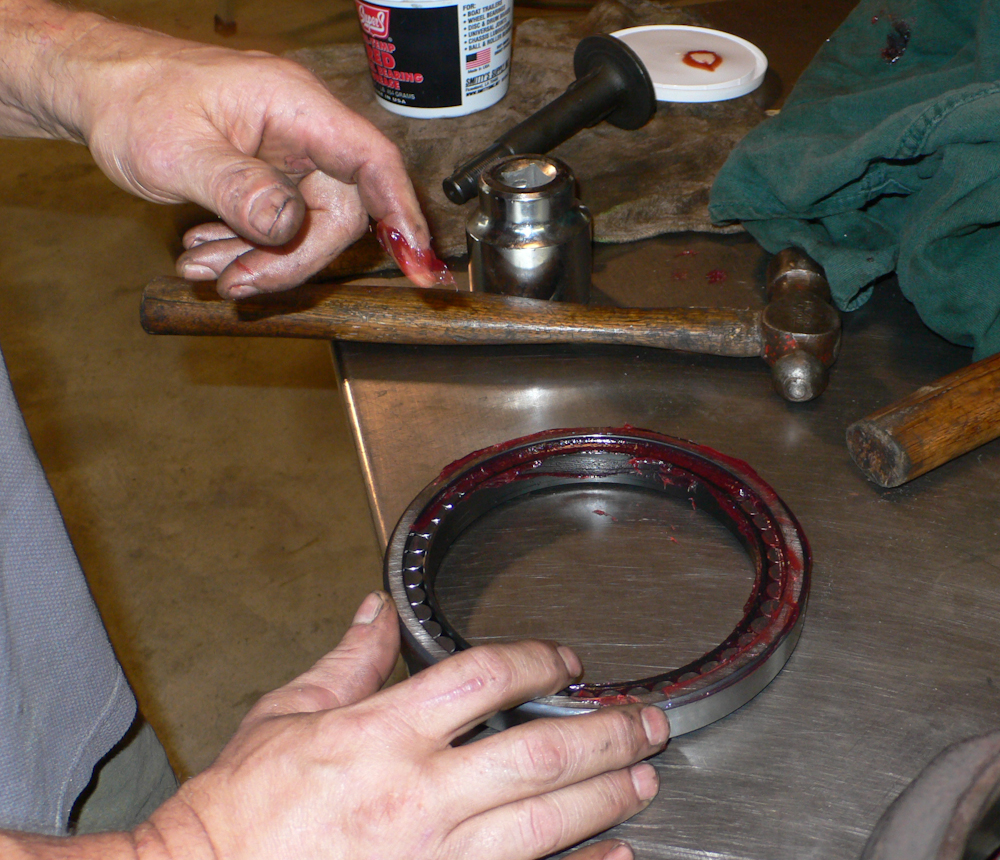
Once
the outer hub casting was cleaned, it was time to reassembly the
hub. Above, the main roller bearings get a coating of wheel
grease prior to assembly.
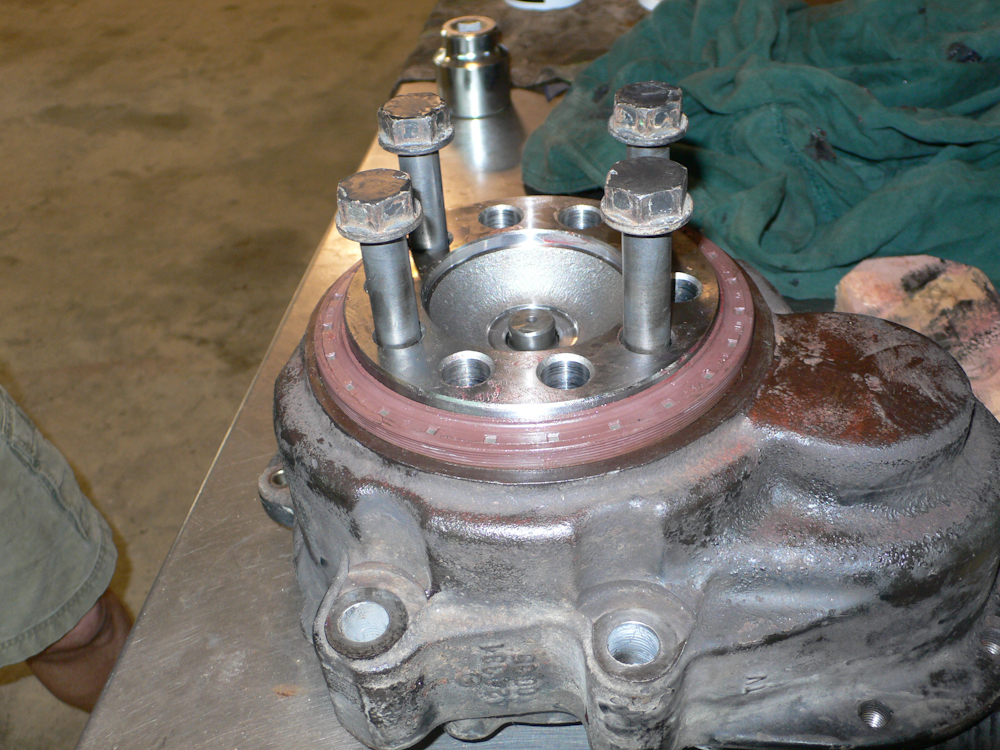
The
lower gear was installed, followed by the roller bearings and the
outside oil seal. Above, the bolts were used to insure alignment
between the gear and the wear ring as the seal is pressed into place.
Light
hammer taps were used to seat the top, outside roller bearing assembly.
Top,
outer bearings fully seated in the housing.
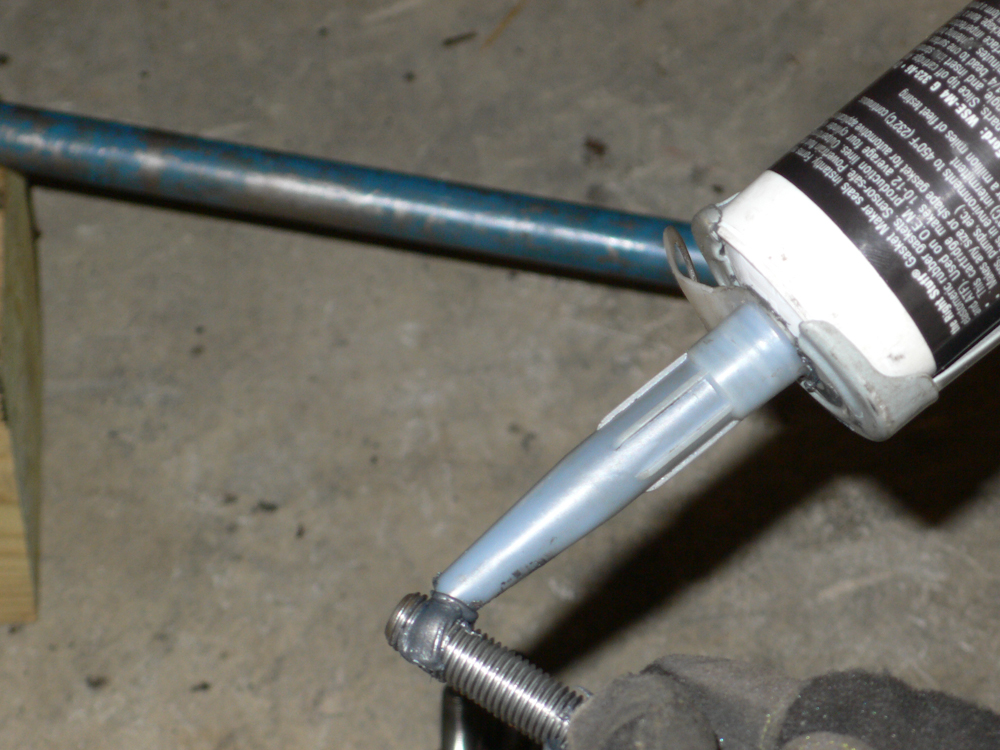
When
all the bearings were installed, it was time to put the halves of the
hub together. Gasket sealer was used on the mating surfaces and
on all bolts used for the assembly.
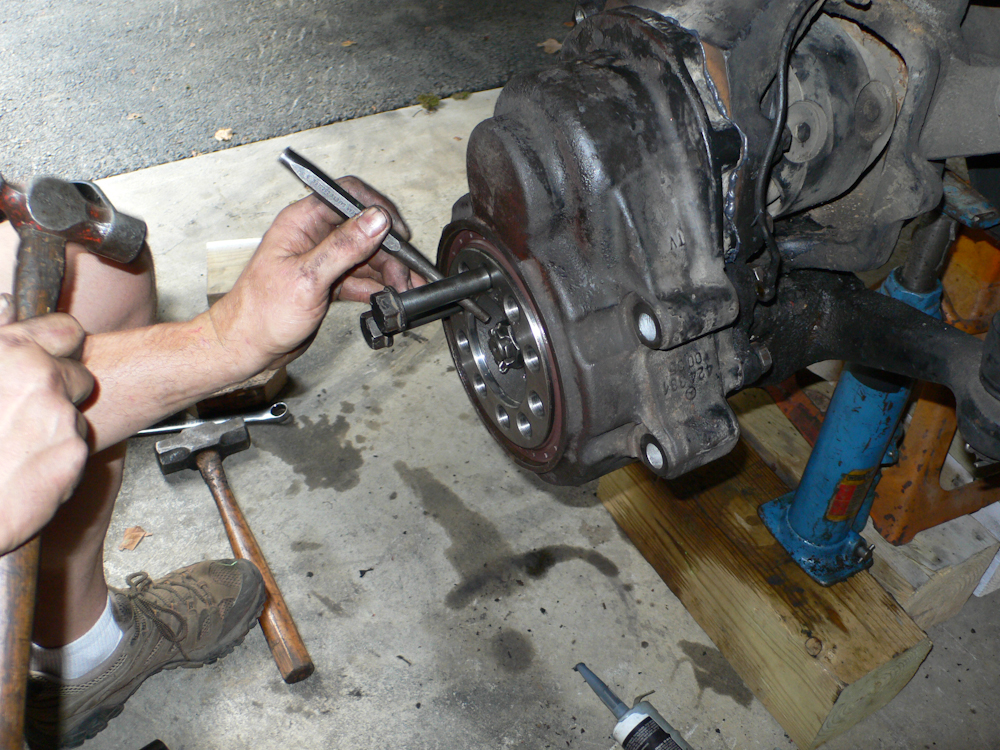
Once
the outer housing was attached and secured, the differential locks were
engaged to prevent the axle from turning. Then, the castle nut
was tightened and a cotter pin was installed to prevent loosening.
Once
the castle nut was installed and tightened, the brake lines were
prepped for reinstallation.
The
calipers were reinstalled and the brake lines were attached.
The brake rotor was installed along with the wheel hub and the hub bolts were inserted. Then, the brake pads were reinstalled and the brake system was bled and a road test was performed.
Special thanks to Mike and Barb for hosting us at their home, not once, but twice. It would have been very difficult to repair our water tank failure without your help. On the hub, this was quite a bit of work that spanned several days. Sadly, I have done this repair before, so there were no great surprises. Bob's help was invaluable in getting this problem resolved in a timely manner. And thanks to Steve who helped out by cleaning parts and helping me test drive the truck.
From
NJ, we are heading south, but we have not decided where. But, we
will have to decide soon.
| Previous Adventure | ||
| Trip Home Page |
Photos and Text Copyright Bill Caid 2010, all rights
reserved.
For your enjoyment only, not for commercial use.